Configure an outgoing Webhook in the Portal
Once you have created your incoming Webhook, you can now test and activate it through the Workspace.
This guide uses Incidents as the publication entity example. Adjust your configuration for Vulnerabilities or Threat Events as required.
Set up your Webhook
-
You need to be Workspace Owner to enable a Webhook. Login to the Portal (https://soc.truesec.app ) and from the relevant Workspace, to go Automations and Manage Webhooks.
-
Select + Add new Webhook, and select Publish event to trigger Webhook for and then your application.
-
Name your Webhook, for example Incident to Microsoft Teams, and describe its target channel and purpose.
-
Enter your complete URL from your receiving application.
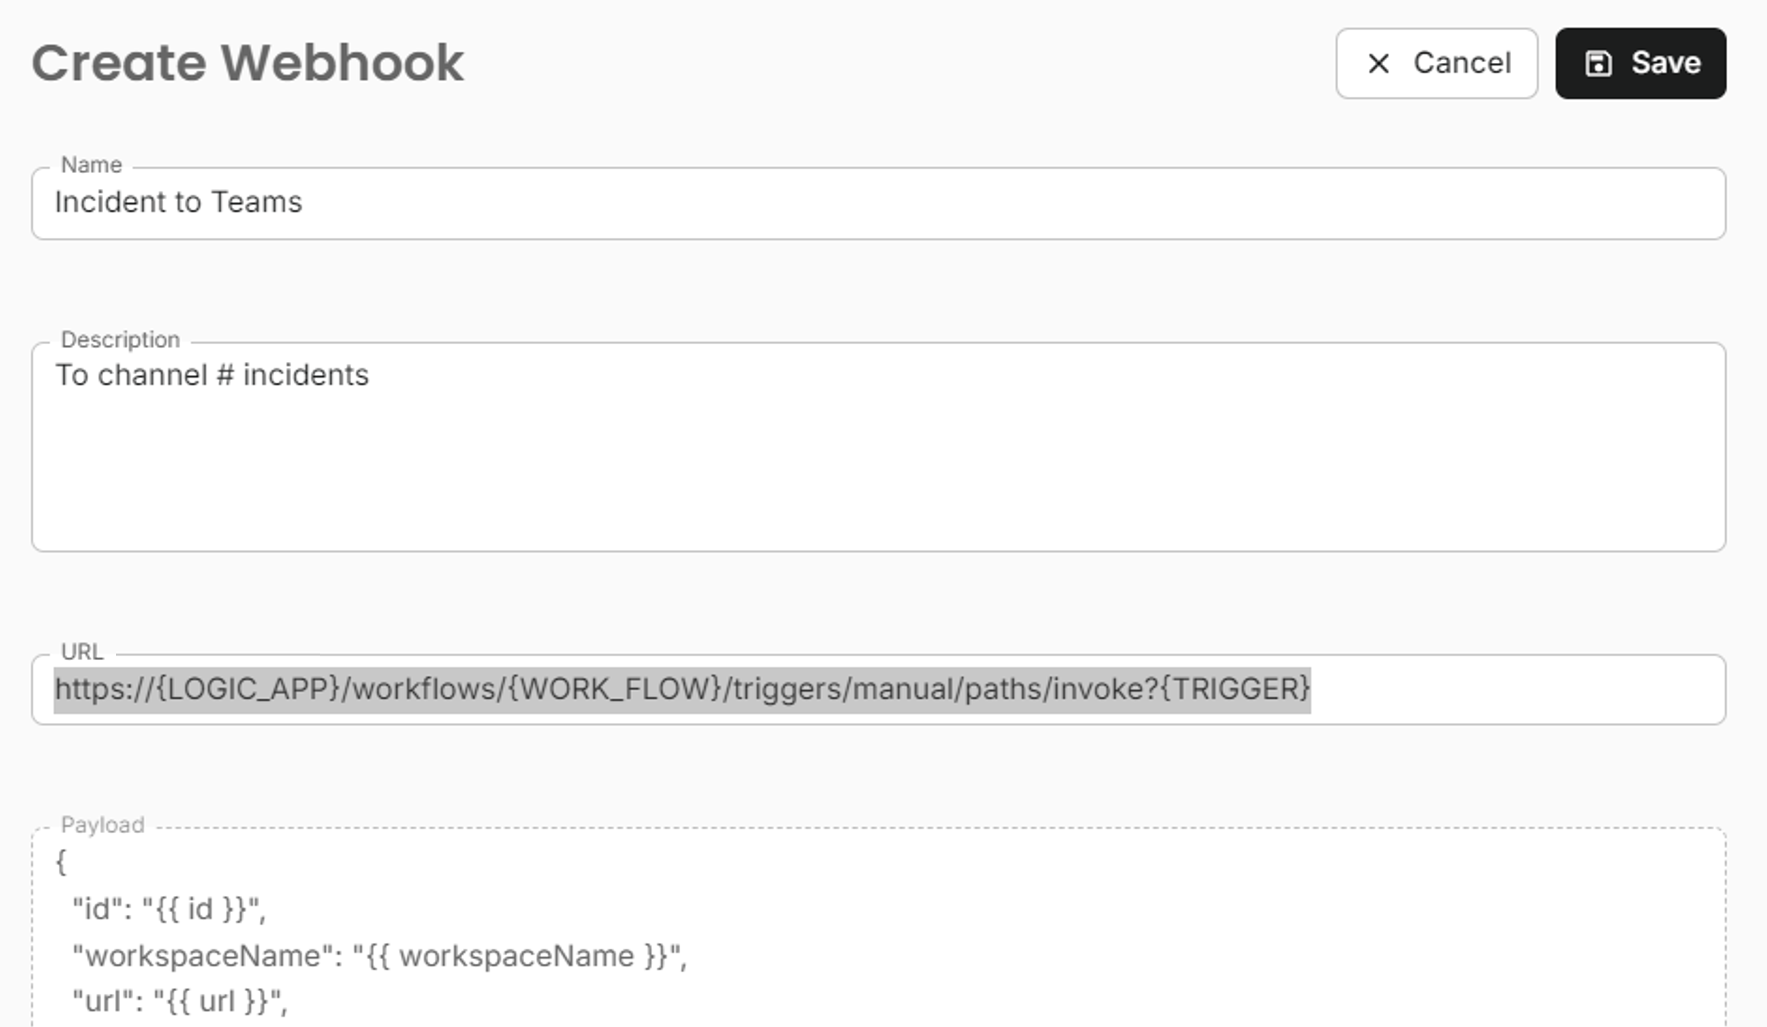
The payload is for your reference, it cannot be changed. Variables to include are defined in the incoming Webhook in your application.
Microsoft Teams and Slack does not by default require additional authentication, other than the URL. Credentials and authentication type should typically be set to None.
-
Save, and then test your Webhook via
...You should receive a templated example Incident as a card in your Teams channel.
If the test is successful, now is the time to activate your Webhook.
-
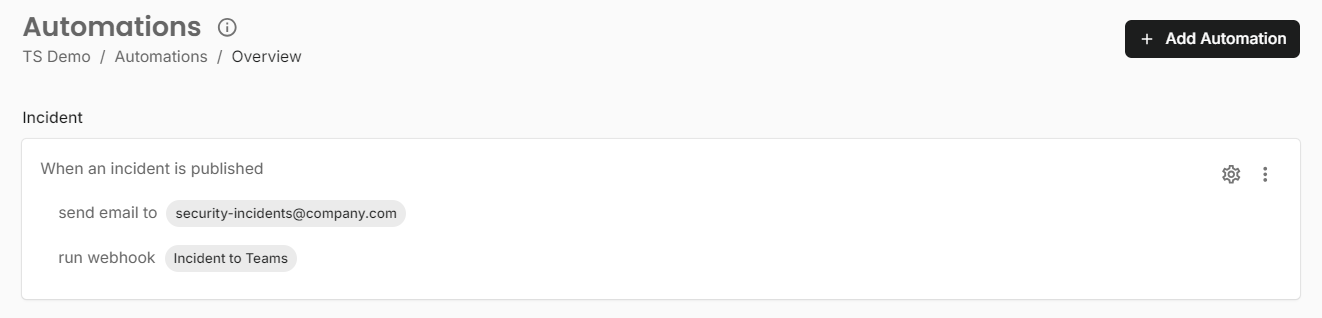
Activate, or deactivate, your Webhook for future published Incidents via Automations Overview.
Select an existing Automation or create a new one, and add your Webhook to the run webhook step.
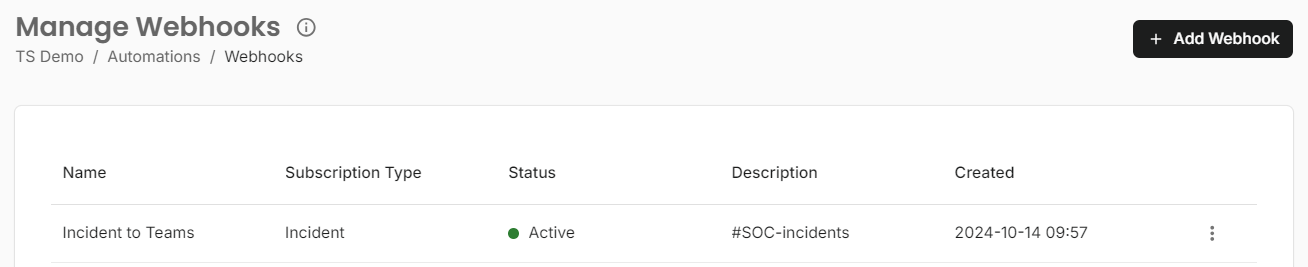
On the Manage Webhooks page, your Webhook’s status should now show Active.
You can request a Dry-run Incident to be published by Truesec SOC, via your Technical Account Manager, to test the end-to-end flow with a simulated incident publication.